

S4Simon
-
Posts
99 -
Joined
-
Last visited
-
Days Won
11
Content Type
Profiles
Forums
Gallery
Blogs
Events
Articles
Store
Downloads
Posts posted by S4Simon
-
-
I’m only up to issue 124. So haven’t had the opportunity to test the ships rear gear. I have noticed that there is a technical issue with the rear range finder in that the metal spindle is too short. Which means that if put together as per the instructions then when tested the gear on the metal spindle will unmesh. All you will hear is a motor sound but no movement. Easily fixed though. I just cut 1mm from a round toothpick and installed in the hole before I put the spindle in. I also add plenty of grease to all gears and wear points in all gearboxes. This also reduces gearbox noise. I also don’t screw the gearboxes tight. I tighten fully and then unscrew all screws an eight of a turn. With regard to props, I know Wayne had the same sort of issue and made a video with a fix… I think.
-
I just guessed at the colours from pics off the inter webs. I used tamiya enamels, xf2 white, x f1 black, xf8 blue, xf15 flesh. Nothing fancy.
-
I am assuming that when the initial turret tests were carried out, they all went fine. And if that's the case, then the turrets themselves and the internals are all good. That then leaves the cables, connectors and how they were connected. As with any cable of this type the more they are pulled and prodded, the weaker the connection point at the connector will likely fail. I would re-check that the right connectors are in the correct position and also facing the right way up. Also carefully check for any pulled wires at the connector end. With what you're saying, I would expect there to be a broken wire at one or more of the connectors, which would lead to the turrets not behaving in the right manner. Turret 1 and 2 - check the azimuth motor wiring and ensure connectors are in the correct position and correct polarity. Turret 2 - check the firing action visually on the underside whilst pressing the button. You should be able to determine whether its a mechanical problem or electrical wiring issue.
-
Here’s mine in place.

-
I was in the same position. Spent a good 10 minutes trying to fit those connectors, and it just wasn't happening. There seemed to be a major misalignment - somewhere (mine was half a screw hole out of whack). But then for no reason at all they just fell into position and screws went in perfectly. So, yes there is a weird issue going on here, but once the stars align, the alignment issues just disappear.
-
-
Yes. Full rigging instructions are in issue 140.
-
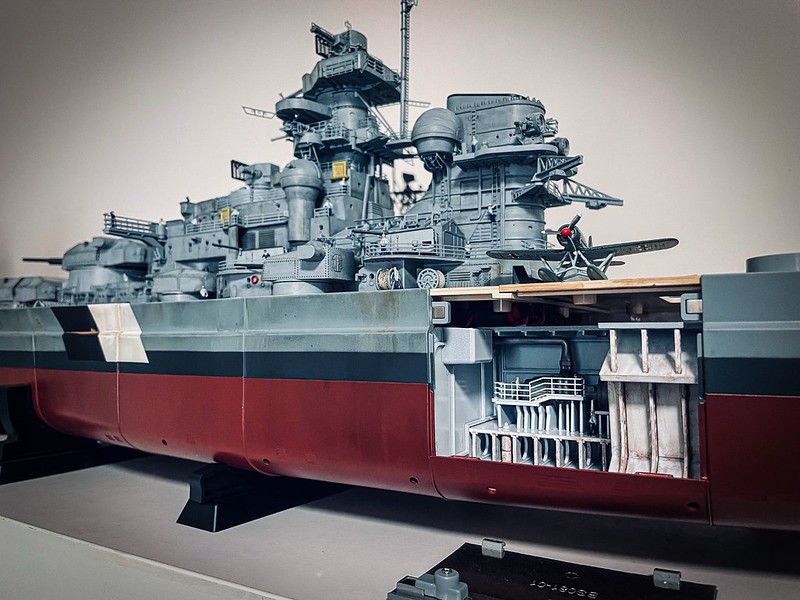
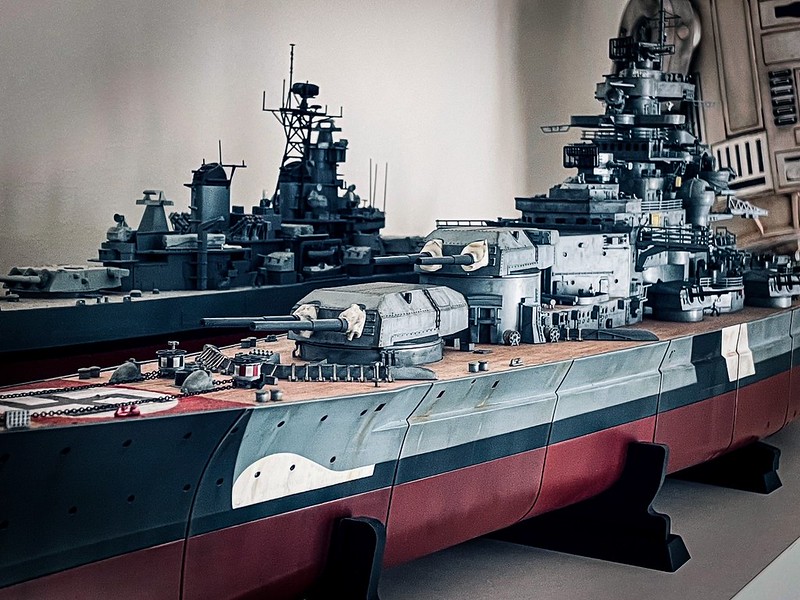
... And some more classic shots of this great model.

-
Not noticeably noisy. I also lubricate all my gears with silicone grease.
-
Hulls finally finished. Onto the final stretch now. 🙂
-
That's a tough one. The testing unit is just a logic unit which sends a basic on/off logic to the main front computer module. So we have to go back to basics here just to check things off.
Check batteries are at a minimum 1.5 volts. Recheck every connection to the computer module. They should be evenly inserted. If you have to remove any leads, don't pull on the wires as this will weaken them to a point of failure. Use tweezers to lever off the connector. Make sure every connector is correctly installed - right way round, and that there are no damaged pins within the connector, or pushed female connectors within the computer module.
Wire up as per the magazine for the test run. Make sure you use the correct extension leads that were supplied. Re-run the test. If still failing, then disconnect all outputs and only check one at a time. ie. test the main turret, if that works by itself, then plug in the next lead and test that output etc...
See how you go. 🙂
-
I've actually bought some premium rigging (elastic) thread. But this won't be done until 139/140, which for me is around Easter next year. I've always loved building battleships (since the 70's). This is a great build. I just hope they release that metal hulled U-Boat next.
-
Rear Superstructure taking shape.
-
 1
1
-
 1
1
-
-
8 hours ago, laverdj said:
Its been a while, and I did find a solution that worked. Since the screw was not in a visible part of the body, I decided to bite the bullit and "drill" it out very carefully.
I managed not to damage anything and then used a slightly bigger screw than recommended and it did the trick
Good Job - Your now a specialist 😉
-
10 hours ago, dave kelsey said:
what kind of glue do you suggest for the bismarck?
I just use a quality superglue.
loctite professional - just from a hardware store.
-
I'm an ex RAAFy. Just built a 50 year old Tamiya 1/48th scale Lancaster and fitted it with a computer to run the lights, motors and synchronised sound. A bit off topic. I was actually looking at the parts build Lancaster at the time, but thought i could do better. The current Bismarck is a wonderful build.
-
Issue 118.
This website shows what's in each issue.
https://hachette.de/Model-Maker/Schlachtschiff-Bismarck/
-
Decking is the hardest part, in that all the decks are slightly different in colour from the factory, so trying to blend them together is... fun.
The decals are just the icing on the cake, really finishes off the ship.
With regard to overall weathering, I'm just building up the weathering as I go. Light layers, so that I can then blend all the ship at the end, especially the decking.
-
Nice... really nice. You appear to be a rigging master. 🙂
-
My methods are fast, simple, and cheap.
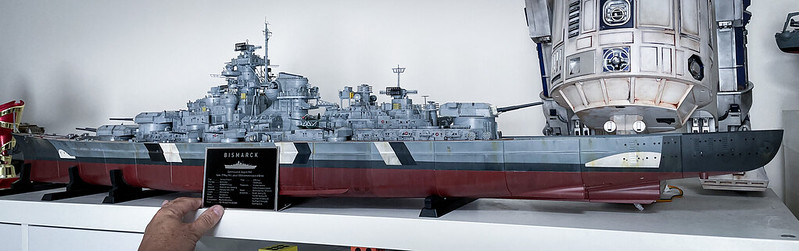
Black oil paint - I use on the hull. Dab a very small amount on a rag, and then just rub onto hull intermittently and then rub with a clean cloth (upwards downwards) vigorously so that there is only a hint of streaking. I used this same method on the Millennium Falcon and R2D2 to great effect.
Drop of black enamel on the end of a coke-can and add thinners to create a black wash, which i then just painted onto all the superstructure. Same method for the deck - a drop of brown enamel plus thinners does the job. I've since discovered bottles of wash at the model shop which does the same thing for 20x the price, but it works.
I've also used the tamiya weathering kits for adding rust marks.
This is my first time weathering a ship, so learning as I go. Other people will have their own methods which will work just as well. It's all about how you want your ship to look.
You can get great results with just trying different methods. Both my Falcon and R2 were weathered only using the rubbing oil paint method - no air brush work here. I just got ideas from other modellers and tried to copy their results through trial and error.
-
Weathering's one of the hardest things to accomplish / master. I look at some ships on youtube and wonder how the hell they get their masterful results. My ship is sort of a 'what if' kind of weathering. I suppose a 1947 look (If it wasn't sunk and made it through the war unscathed). Weathering is a personal choice. Just enjoy the process 🙂
-
I'm assuming that the individual test of the radar motors went ok. If that's the case then the motors are fine and we can discount them as the issue. The mini circuit board and larger pushbutton tester box are just simple current pass through devices and I haven't heard of them ever failing. So it comes down to either battery issues or connection issues into the main logic computer board. You've said that you changed the batteries, but I would actually check them with a multi-meter. They should be registering over 1.5 volts each. Then recheck the connection points at the logic board.
-
Search ebay.
This is what I bought.
Universal Warship Crews 1/200 Scale Ver.B WW2 Navy Crew Resign Model Set 110PCS
-
Just adding some dry dock pics.
\


 \
\
Stage 124
in Bismarck Chat
Posted
Yes I can confirm that the switch needs to be inverted. Magazine pics are wrong. Had me confused for a bit yesterday when switch kept falling out and switch mechanism was internally at an angle on the inside gearing. Flipped it over and all good. As with all my gearboxes I added plenty of grease. Also I tighten the gearbox screws fully then wind back an eighth of a turn to free up the gears.